Saturday, May 29, 2010

Market day


I was looking forward to the market for more than a week. It is The Irene Village Market and it takes place every second and last Saturday of the month. Normally my Saturdays are spent teaching but things are changing and I had the day off. 
 My first stop was the Deli section and the guy from Baker Boys was still unpacking these muffins! I was speechless. I took some photos and bought one each of these, I think the top ones are lemon cheesecake......... say no more... it even had some real cheesecake inside! The other one I bought was a carrot and white chocolate one, with nice and sticky brown sugar on top....... I am still licking my lips!

Hendrien from Wow Cow has been making handbags for ages, now she started making these flowers and they are selling like hot cakes. She uses the same leather as for the handbags but magically turns them into flower broaches, using Springbok skin, beads, wire and buttons.

Even the long stem flowers are so colourful.
 Ok, and then I had to find the best looking cupcakes at the market..... 

This stall was so busy that when I asked for a business card, Lindie only gave me a piece of paper with her name and cellphone number.
Then over to the antique section were there was this beautiful old teapot and cups, which I am sure would tell a few tales it could. After being outdoors for the morning and experiencing  the market atmosphere again I am ready for the rest of the weekend.

Tuesday, May 25, 2010

Nine Love Stories ATCs- Post Script


My inspiration for the Nine Love Stories ATC canvas came from an article that appeared in an Australian Papercraft magazine about four years ago...


I made this as a gift for a dear friend  when she moved into a new house and she now has it in her guest "powder room" ;)   The papers used are from Making Memories - not sure if it is still available?  You may also notice a lot of similarities between the ATC layouts on this canvas and the one I've shared with you previously.  The canvas was covered with a paper serviette (napkin) that matched the colours of the background paper used for the ATCs.


Thanks for popping in.

Sunday, May 23, 2010

Pretty in pink.


Hi girls
 Sometimes during a class I just have that urge to stop teaching and jump in and take part and make something for myself. That was what I wanted to do on Saturday, maybe it was because Rita enjoyed herself and created something so beautiful. This is her canvas which she named: 
"The birds and the bee".

 
She used gel medium to glue down the serviette to the canvas. A little bit of gesso on top of the serviette got rid of the harshness of the colours and then, when completely dry, she did some stamping. Later she sprayed the canvas with Tattered Angels.

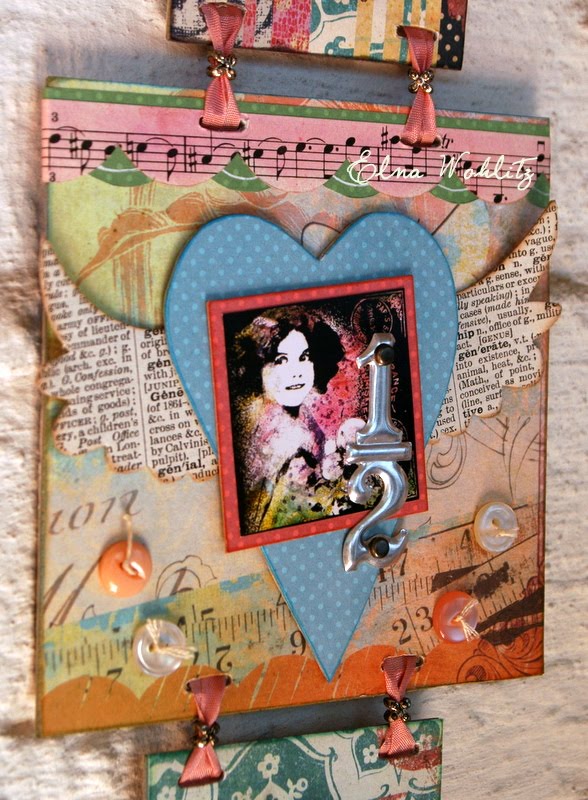
Then it was time to fill the tubes with everything in sight, small shells, beads, sequins and words cut from a book. Pictures, words and fibers on the tubes then completed the look she wanted. Each tube has a cork decorated with beads, bead caps and a head pin to keep it in place.
Inspired by this canvas she has done, I hope I get a chance to make one this week.
May your Monday not be blue!

Friday, May 21, 2010

Nine Love Stories - Final Entry


Here is the final installment in the series...


This ATC has the same Anna Griffin background paper and yet another ARTchix Studio image.


I've also used an enamel plate from 7Gypsies and added bling to centers of the flower "ribbon"...


The ATCs were arranged on a stretched canvas and stuck down with dimensional (mirror) tape.  If you look closely, you will see that I've stamped swirls in the corners before sticking down the cards.


We trust that this project will inspire you to look at ATCs in a whole new way :)  Why not invite 8 of your creative friends to collaborate in a similar project and create a unique piece of "wall-art"?


Here's wishing you an amazing weekend!!


Wednesday, May 19, 2010

Saturday's Canvas and Test tube Class


Hi Girls

A change of venue.
We decided to have the class at my studio on Saturday. There are still a few places available, please email me so I can book you. 
Keep crafting!


What fun we had...


Our first "Test Tube Canvas" class took place at my studio yesterday.


Here are some of the pics, including a glimpse of the organised chaos in my studio!?
Don't you just love our funky aprons??  Elna has decided that an apron class is on the cards in the very near future - watch this space...


Linita made this for her "Delft" kitchen.


The bird house paper serviette caught Melissa's eye the minute she walked into the studio and that was it!?  If you look closely, you will see one of my Yorkies lying on an orange pillow just to the right of the canvas that Melissa is holding up.....


Melissa's canvas completed - don't you just love the clolours?


We still have a few spots left for Saturday's class - contact us if you are interested.


Till next time...

Monday, May 17, 2010

Preparing for this week

I trust that you've had a creative weekend ;)


Elna and I are hard at work in preparing for our classes this week...  Here are just a few of the supplies that our guests can choose from!?


Looking forward to seeing you soon.


PS.  Happy Birthday to Zoe!

Saturday, May 15, 2010

Being Romantic in May.

Hi girls
Thanks to those of you who attended my class this morning. It is always good to see the old faces and then a few new ones as well. As I promised here are the photos so you would know how to assemble the garland and add the final touches. Remember to start the pink ribbon at the top. Fold it in half and start threading it through the ribbon slots that you have made in the grunge board. Work you way down both sides, putting in the silver "thingies", between each grunge board piece.  
All paper to grunge board was done with gel medium.The pictures are from Crafty Individuals, and the paper from 7 Gypsies.
The tickets are from Tim Holz, the lace ribbon and charm are from my stash.
Remember that your grunge paper is very flexible, so bend those wings so they can fly!
Nothing as far as I know, sparkles as much as the Zing Silver Glitter Embossing Powder. I used it in class today, but for my garland, I used Ranger stickles. The punch I used is a Martha Stewart punch. A sparkly crystal and a piece or silk ribbon ends off the garland.

Friday, May 14, 2010

Nine Love Stories ATCs - Part 8

  
Here is the second last ATC in the series.


I've added a key charm to the same Anna Griffin background paper and another ARTchix Studio image.  


A heart charm was tied to organza ribbon to fit in with the quote on the ARTchix image.


Wishing you a great weekend filled with creativity and at least one cupcake!?

Wednesday, May 12, 2010

Tags to Go

 
This was one of my first classes ever that I've designed.  You may even remember some of the papers used?

We made 16 tags which were stored in a tin.  They catered for just about every event possible!?  From a tag for a new baby, to one for a teenager, a friend, a new house, sympathy (see if you can spot the tag with a tissue in it??), "get well soon", and a couple of generic tags ;)

Hope this inspires you to have a creative Wednesday!?  Watch this space for our 2010 version coming soon.

Thank you for visiting...

Monday, May 10, 2010

Nine Love Stories - Part 7


This is the seventh in the series...


Same Anna Griffin background paper, another ARTchix Studio image, metal "photo corners", fiber trim and a vintage watch face & hands attached with  a brad.


The metal corners looked a bit dull, so I've added a drop of Stickles into each of the holes to jazz them up!?


Hope you have a creative week :)

Saturday, May 8, 2010

Enjoy the day


Mother's day can be a very sad event. If you lost your mother and miss her, it is a sad day. If you are far away from her and can not be with her, it also is a sad day, but you can still call her. But me... I don't really like mother's day, because I will never be a mother, receive a mother's day gift, be the mother of the bride or be a grandmother. After lots of infertility treatments, two tube pregnancies and many tears the reality slowly dawned on me. Sometimes I feel lucky not to have children, but sometimes it still just gets too much.

So a few roses to all of you who don't have or never will have children. From one Earth Mother to another: Happy Mothers day, Sista's !

Thursday, May 6, 2010

Needle work Canvas

Hi Girls,
A while ago we went through the Inchie and Twozies/Twinchie thing. It sparked a whole range of projects that we did. Great fun and not too many mistakes were made, if any they were only 1" or 2" mistakes.
Here Benice used a 6"x8" canvas and it has a needlework theme. The canvas was painted with acrylic paint. The Sew Special stamps from Crafty Secrets were used.

Small metal charms, fabric, buttons and tulle were used as embellishments. 
     
 
Here I used a piece of an old dress pattern to cover the canvas. The gel medium was colored with a drop or two of Ranger's Adirondack Color Wash ink. When covering the canvas, first do a layer of gel, put down the pattern paper and then again another layer of gel, leave to dry before you start sticking down the squares. The stamps I used are also from Crafty Secrets and the paper is from K and Co.
This could be a nice mothers day project, specially if she likes doing needle work. Replace some embellishments with photos of her. I hope some of you will try this project, closer to father's day I will show you my take on the Father's Day Canvas.
Enjoy your day.

What happened to the pumpkin?

Hi, for those of you who wondered what happened to that glorious pumpkin.... here are the photos.

A friend turned the pumpkin into a Sunday lunch for eight people. Wonderful steaming hot food. 

The pumpkin was first roasted in the oven, pips removed and the inside rubbed with Cinnamon and butter. When the pumpkin was done a meat stew was dished into the pumpkin and then placed back in to the oven for a while before serving it to the guests.
It was amazing how long the food inside the pumpkin stayed warm.

Tuesday, May 4, 2010

Nine Love Stories - Part 6

It's been a while since the previous installment...  Here is ATC number 6.


Once again the same Anna Griffin background paper, ARTchix Studio image, and then 3 paper roses and a heart-shaped mirror.


The lady on the image looked a bit "dull", so I've added a crown charm to give her some CLASS!


After stamping an image of a rose on the mirror, it was framed with Stickles from Ranger.  A tiny tag from a box of K&Company Tags To Go completes the ATC.


6 down, 3 to go!!
Till next time...

Monday, May 3, 2010

Our next Class

After many requests from our friends and clients, Elna and I have finalised the dates for the "Test Tube Canvas" class...

You can choose between 18 and 22 May!! Check out the "Classes & Events" links on the right --->


Here is Elna's take on the canvas.


I just love the beading stuff she's used on the cork tops!

Metal mesh, antique sequins and pins.


A bead cap adds interest to the bottom of the test tube. Rayon ribbon and glass leaves complete the look!?

Go to our entry of April 8th if you want to see more examples...

Hope to see you on the 18th or 22nd of May - email us to book if you battle to do it through our blog...

Saturday, May 1, 2010

Serviette Cards

Here are three ideas for making cards, using those gorgeous paper serviettes (napkins) that you get.

The first layer is a piece of paper from an old book. The second layer is a piece of card stock embossed with my Cuttlebug. The third layer is the canvas paper and the serviette. Then lastly, the bird with the swirl stamp.


Serviette on canvas paper: Remove the backing of the serviette so that you are only left with the top layer. Paint a piece of canvas paper with gel medium and place serviette onto it. Paint another layer of gel medium on top of the serviette, work gently and carefully. Leave to dry and cut to size.


The bird: Use a page from an old book, a bird template, a swirl stamp and a piece of card stock to create the bird. Paint the card stock with gel medium, place the book page on top, gently rub over the paper to get rid of any bubbles. Leave to dry, trace template, stamp with swirl and cut out. Decorate with bling and chalk the edges.

This card is 6"x6". I used a piece of matt acetate on Benice's recommendation and you get a wonderful effect with it. Remove all the backing from the serviette and paint the acetate with "Mr Hook's" High Build Sealer. Lay the serviette face down onto the painted acetate, paint on another layer of high build sealer. I made an extra butterfly the same way, which I then cut out and stuck down onto the butterfly in the middle of the card. Trim the acetate, matt and secure with glitter brads and decorate with ribbon.


For this card I used artist watercolor paper, because it can absorb a lot of moisture. Remove the backing of the serviette (normally 2 layers) so that you are only left with the front printed layer of the serviette. Paint some gel medium onto the watercolor paper and lay down the serviette. Paint another layer of gel medium on top of the serviette. A soft, longer hair paintbrush works well. Leave to dry. Spray some old music paper with " Tattered Angels" and tear into desired size. Stick down when dry. Mount the picture on some card stock and finish off with a ribbon and a flower with a bling brad.