Showing posts with label Stamping. Show all posts

Monday, July 14, 2014

Colour Therapy II

A few more photos of the pages that belongs 
to my colour therapy art journal.
The quote on the first page is so true, I love it!


As always a bit of glitter here and there.


The black ink was to harsh, so I over stamped with white ink.


I used some kind of mica flakes (to leave a little sparkle) 
and adhered it with Glossy Accents. 


Orange, Pink and Yellow!
What more do you need to get you going?


Monday, July 22, 2013

Cards with a vintage look

Today is actually a big day.
They started building my new studio.
For the next three months it will be dusty, noisy and busy.
 
Everything is charged, me and the battery of the camera!
 
I love this look for winter and on these cards I don't want more
embellishments or elements. Dry emboss the pink card stock
and then colour it with Distress inks.
 
I used Spellbinder dies and Sizzex dies with these cards.
Here is a list of things you might also need to complete the cards.
 
Chalk ink
Different dies
Stamps
Archival ink
Paper distresser
Glimmer mists
Distress Stain
Distress inks
Double sided tape
Foam tape
 
Mist the card stock (which is behind the picture)
with pink Glimmer mist before gluing the picture
to the card stock.
 
You can also colour the seam binding tape with your
Distress stains to give it a darker colour.

The lace tape is like a sticker, just peal off the backing and stick down.

Maybe... a small doily behind the brown piece of paper?
Enjoy making the cards.
x


Cards made with Love

Spray and Stamp and Cut and Sew. All in a day's work.
I love using doilies on my cards. From now on
I will be layering the doilies as well.
Big and small and in different colours.
 
This is my favourite card of this bunch.
 
When I look at these photographs, I can see what extra I should have put on.
The cards that I see on the Internet has lots of die cuts and
labels on them and they look gorgeous.
 
The green card stock was stamped with shadow ink
and the edges were then distressed.
 
The bobbin label was stamped separately, cut out and glued down.
 

Grandmas nails were done with some pink Stickles.
 
If you have Distress stains or Distress Inks, it is easy to colour in the stamped image.
Wet a small brush, wipe off the excess water and pick up some ink and colour away.
 
The wording was coloured with Silver Distress stain. Perfect for chipboard.
 
Dry emboss the pink paper and the sand it lightly.
 
Plain Bias binding are very versatile. Colour, cut, crinkle and stamp.
 
Here I used some green embossing powder around
the edges of the green card stock.I sprayed the paper with
Glimmer Mist and dry embossed the paper.


Sunday, April 21, 2013

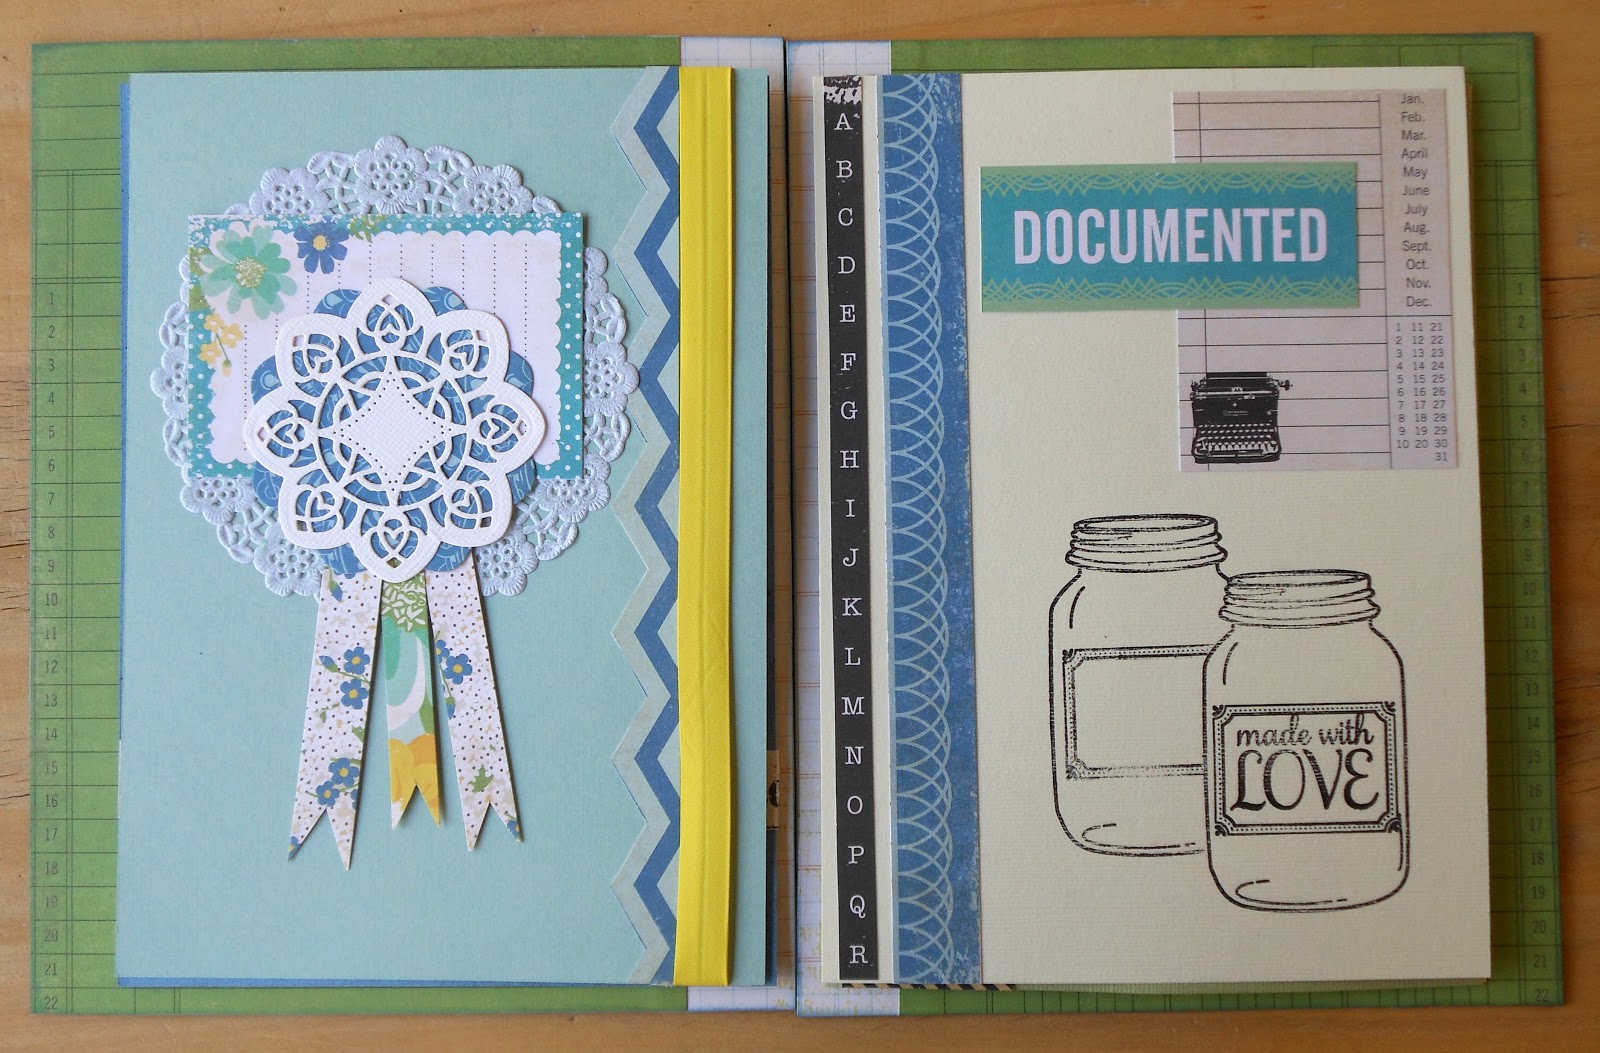
Recipe Book with Mason Jar and Shadow Stamping

Hi there everyone,
welcome to our blog and to this post. Today I am sharing with you, my Recipe book.
The book was inspired by my clients who wanted to make a recipe
book and by this beautiful colourful paper by Echo Park Paper,
and of course by the mason jar picture on one of the papers!
 
 I painted the chipboard letters with Distress paint from Ranger
and then changed the colour with the Distress Stains.
(also from Ranger)
 
This shows you how I placed the double sided tape to stick down the
inside of the front cover. You can use your favourite glue of choice.
 
On the left hand side, which is the inside of the front cover,
 you can write down the index of your Recipe Book.
 
I used a Mask from Prima and sprayed the blue card stock with
glimmer mist.
 
The rosette was cut with a Spell Binders Die. The front part cut from
white Bazzill card stock and the back side form the Echo Park paper.
The doily was sprayed with glimmer mist.
 
The Mason Jar stamp is from Hero Arts.
To do shadow stamping is quite easy.
Stamp the mason jar on the piece of Vanilla Card stock.
Stamp another image onto a piece of thin paper and cut
out the image with your scissors.
Place the image onto the first stamped image and stamp next to it,
but it must overlap.
So... if you look at my picture, you first stamp the image
on the right hand side and then the image on the left hand side. 
 
The fork is a printed piece of cotton ribbon. Some papers were left 12" long,
and just folded in half and wrapped around the edge of the page and glued.
 
The green card stock was sprayed with glimmer mist and I used
another mask from Prima.The small flowers were punched with
a McGill punch.
 
The back of the yellow card stock was also sprayed with
glimmer mist.
 
Punch 5 tabs out of the remaining pieces of card stock and stamp numbers
onto them. Put double sided tape onto the tabs and stick to the
outside of the plastic A6 page protectors.
 
Start by placing number 5 and 1 in the correct positions.
Space the rest of the numbers and remove the backing of the tape to stick them down.
Put all 5 pages into your page protectors. 


For the envelope: Cut off a piece of the top back side.
Fold the remaining front flap over to the front. Fold open again and
use a die cut to create the border. Stamp the two images and use
washi tape and bias binding at the bottom.
 
Bind the book together with three metal rings
and you are done!


Thursday, April 18, 2013

Afrikaans Words for Stamping

Hi everyone
My home language is Afrikaans. My second language is English.
You all know I love card making. Whenever we make cards we want
to give to our friends and family, we have to make do with
English wording on the cards, or computer printed
words in Afrikaans. BUT last week I met two brave girls
who decided to create their own stamp range with
beautiful words from the heart, in Afrikaans!
They know that they have a limited market for these stamps,
but went ahead anyway. I know there is a huge need for these stamps.
 
When I got home after the launch, I wanted to make cards and put these
words on the cards!! But I had a mental block.

My clients has been asking me for smaller cards.
Ones that they can easily post, but I
love working on 15cm x 15cm cards. So, I was stuck for a while.
 I then did what I normally do with patterned paper, but just on 7,5cm x 7,5cm.
So this was the result.
 
 After that I played around for a while with the words and some other stamps
to create these cards. It felt so good to do some plain and simple
stamping after so long. Smooth, white, semi coated 200g paper is ideal for stamping.
 
When you have decided on a design that works for you,
you can make lots and lots of these small cards to keep, or give away as a set.
 
The supplies I used for the feather card.
White card stock
Polymer stamps
Acrylic block
Archival ink (any colour)
Stamp cleaner
Wet sponge
 
Thank you Debbie and Mandi!!
I think you both did great.
I am very grateful.
 
( the stamps are available from me at R170.00 )